Fine Jewelry Made in the USA
How We Process Your Order
It can take anywhere from 30 minutes to several hours to create a new badge pendant design. And if we’re designing a new ring, that can take a few days to design as well.
At Alamo City Gold & Silver, we do our best to provide you with accurate information that will help you understand and determine our services.
Use your old gold to create any custom jewelry!
We can use jewelry you no longer wear (necklaces, earrings, rings etc.) to melt and create your badge pendant or custom made ring, just ask us how!

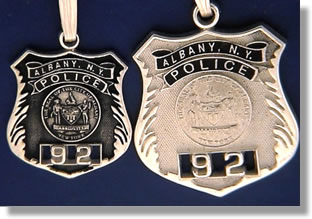
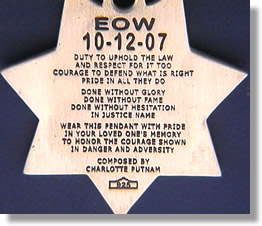
 Step 1.) When we receive your order, we either personalize an existing badge pendant, or create it from scratch to recreate your badge as close as possible to the original.

 Step 2.) Once the artwork is finished, David or Stephany transfer a “toolpath” to the Model Master CNC Milling Machine where the badge pendant is precisely cut from a wax block. What is left is a very detailed master wax. Each item can take anywhere from 45 minutes to 9 hours per wax depending on the detail and size of each piece.

The machine cuts with detailed precision. This technology and detail wasn’t available to us just a few short years ago. This machine is what allows us to make your miniature badge pendant or ring with such intricate detail.
Step 3.) Once the cutting is complete, each individual wax is cleaned closely to be sure the final casting is smooth on each edge. Steve trims each wax by hand.
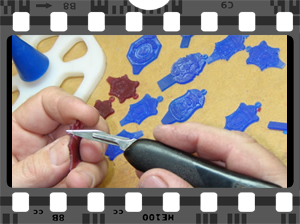
He can “trim & tree” up to 10 badge pendants an hour.
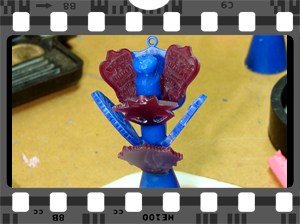
Step 4.) Each wax is then sprued to a wax tree so it can be cast together in a flask that contains either all silver or gold pieces. It is important to allow adequate space between each badge pendant so the liquid gold or silver can flow freely. Each tree usually holds up to 12-15 badges pendants depending on size.

Step 5.) The “tree” is then set up in a flask tightly. The air tight seal at the bottom can be the difference between a perfect badge pendant or a melted mess.

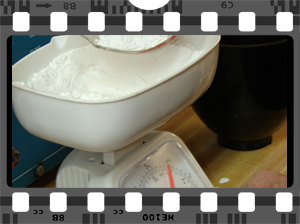
Step 6.) The investment must be carefully calculated and weighed then added to precisely the right amount of water to make the perfect setting solution.

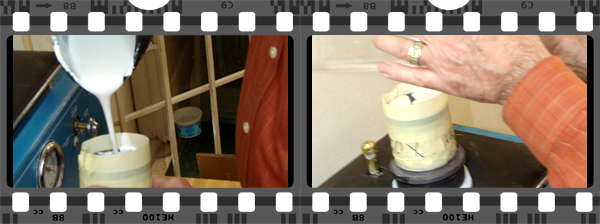
Step 7.) The investment is poured into the flask and vacuumed to remove any possible air bubbles. Even a tiny air bubble could cause badge pendant details to be unreadable and force the process to begin all over again by cutting a new wax.
Step 8.) The flask is then ready to be placed into the oven for “burnout”, or the wax elimination process. The oven must stay at 1350 degrees Fahrenheit for several hours causing the wax to be fully removed from the investment. Then the burnout is completed with another few hours of “setting” at 1000 degrees and then 900 etc. It must be done in the right order for the right duration of time, or else… you guessed it… back to step two! The burnout process takes up to 8 hours and is often done overnight.
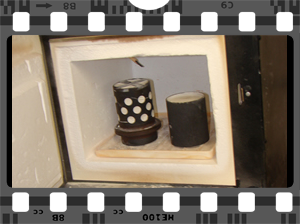
Step 9.) The metals have to be carefully weighed and calculated, then blended with metal alloy to be sure we manufacture in the correct karat; either sterling, 10kt or 14kt gold. Nobody would want a 12kt badge pendant when they ordered 14kt!
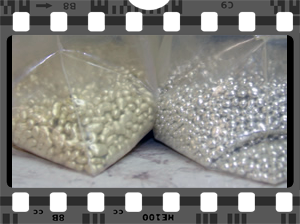
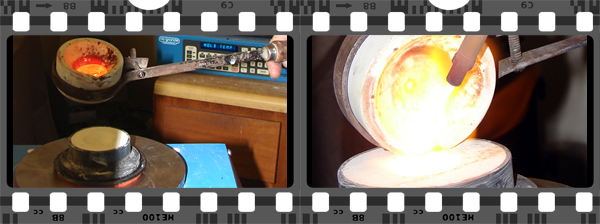
Step 10.) The metal is heated to precisely the right temperature causing it to liquefy so that it can be poured into the burned out mold flask. This takes several minutes using a torch heated to over 1600 degrees Fahrenheit. Many customers have used sentimental pieces to melt & create another new piece with even more sentimental value.
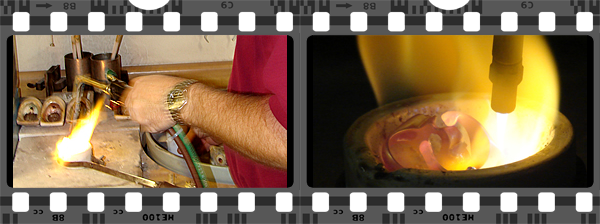
The metal must be heated carefully and kept at the proper temperature the entire time so that it can easily flow into the vacuum centrifuge casting flask.
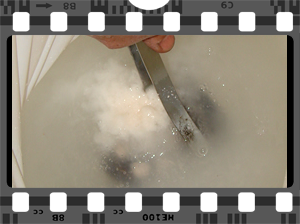
Step 11.) The flask is then lowered into a cool bucket of water for a “super cool” quick set. This is called the QUENCH. The remaining investment is washed away, leaving only the badge pendant tree seen below.
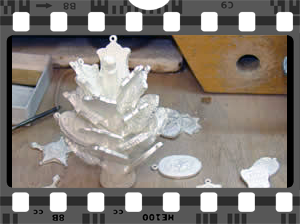
 Step 12.) The cast tree comes out of the investment in a “rough” dull finish form. Each badge pendant must be carefully cut by hand from the tree so as not to damage the other badge pendants that are still remaining.
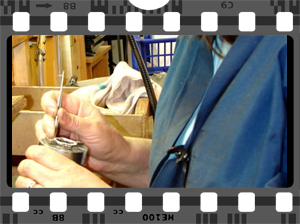
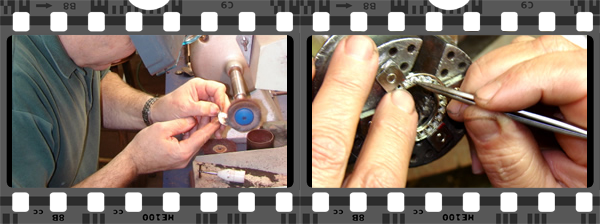
 Step 13.) Each rough badge pendant is polished by hand with tripoli and then rouge to bring it to a high polish. This step can take 1-2 hours per badge piece. It takes an experienced eye & a steady hand, because too much pressure could polish the details right off a badge, and we would have to go back to step two. This step in the process is what makes a jeweler’s fingers look so dirty all the time. They really do wash their hands several times a day, promise!
It is a mark of pride for a jeweler to have the blackened nails!
Step 14.) Each polished badge pendant goes to one of the jewelers to get a bail soldered and possibly a diamond or birthstone set in the badge pendant as well.
Step 15.) The badge pendants must be deep cleaned in our ultrasonic machine which guarantees no polishing rouge or gold dust is left in the grooves of the details. They usually soak for several hours to assure they are fully cleaned before moving on to the next step in the process.
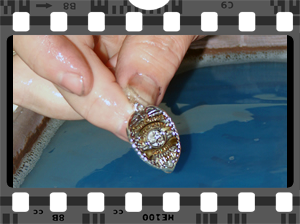
Step 16.) The last step in the manufacturing process is the inking. We use a standard antique ink. It is brushed on by hand, allowed to hard set for 2 hours and then carefully removed by an experienced hand.
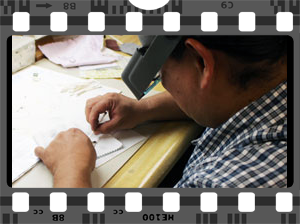
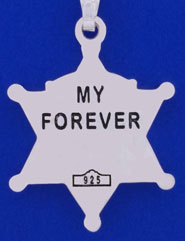
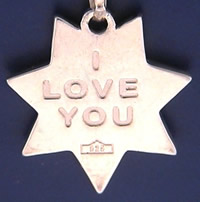
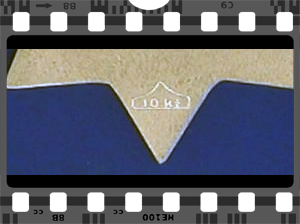
Step 17.) Once the badge pendant is finished, we mark it with our manufacturers stamp. Our mark is an Alamo outline which includes the karat stamp inside (.925 or 10kt, 14kt, 18kt). You may need a microscope to see it, but by law, it is there!
 Step 18.) Once a badge pendant is completely finished, the piece is pictured for our inventory catalog. The pictures are then added to our website for a current listing of all available badge pendants.

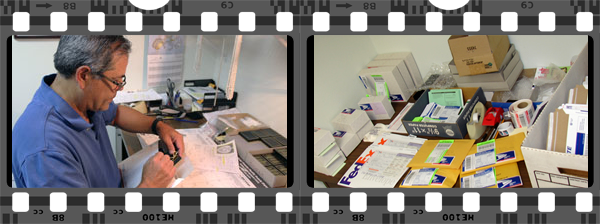
Step 19.) The last step is shipping, or local pick up for our San Antonio customers.
 Complete Satisfaction Guarantee!
We go through an extensive quality assurance process before we ship any product to our customers. We pride ourselves with our customer service and knowing that each customer order is complete to their satisfaction. Check reviews for up-to-date comments from Google!